This quickstart guide will teach you how to run an in-memory instance of Aerogramme, because it is easier to run than a distributed real-world deployment. The goal here is that you get familiar with the software, you understand what it does and what it does not, so you can evaluate it. Once ready for a real deployment, you will find all the information you need in the cookbook.
Enjoy your reading!
What is Aerogramme
Aerogramme is a Message Delivery Agent (MDA) that speaks the IMAP protocol. It makes sure that your mailbox, and thus your emails, are stored safely and stay in sync across all your devices.
Aerogramme is not (yet) a Message Transfer Agent (MTA) as it does not speak the SMTP protocol. It means you can't send email for example with Aerogramme alone, you need to plug it to a MTA, like Postfix or opensmtpd. The connection between Aerogramme and the MTA (Postix, opensmtpd, etc.) is done through a protocol named LMTP.
Get a binary
Aerogramme is shipped as a static binary for Linux only on amd64, aarch64 and armv6 architectures.
For convenience, a docker container is also published both on Docker Hub and on Deuxfleurs' registry.
Also, Aerogramme is an open-source software released under the EUPL licence, and you can compile it yourself from the source.
To get the latest version of Aerogramme and the precise download information, both for binary and source releases, go to the dedicated download page:
To check if the binary you got is working, just launch it without any parameter, and an help message should be displayed like this one:
aerogramme 0.2.0
Alex Auvolat <alex@adnab.me>, Quentin Dufour <quentin@dufour.io>
A robust email server

USAGE:
    aerogramme [OPTIONS] <SUBCOMMAND>

...
If you use Docker, you can get the same result with:
docker run --network host dxflrs/aerogramme:0.2.0 aerogramme
Using host network is not required for this example, but it will be useful for the following, as, by default, Aerogramme often binds on localhost, and thus its sockets are not available outside of the container even if you bind the correct ports.
Starting the daemon in development mode
To start an in-memory daemon for evaluation purposes, you don't need any configuration file. Just run:
aerogramme --dev provider daemon
If you use the docker container, you must launch:
docker run --network host dxflrs/aerogramme:0.2.0 aerogramme --dev provider daemon
Starting from now, docker commands will not be given anymore. We assume that you have understood the pattern on how to map the documentation commands to Docker.
Now Aerogramme is listening for IMAP on [::1]:1143 and for LMTP on port [::1]:1025. A test account has been created with username alice and password hunter2.
Connecting your emails to Thunderbird
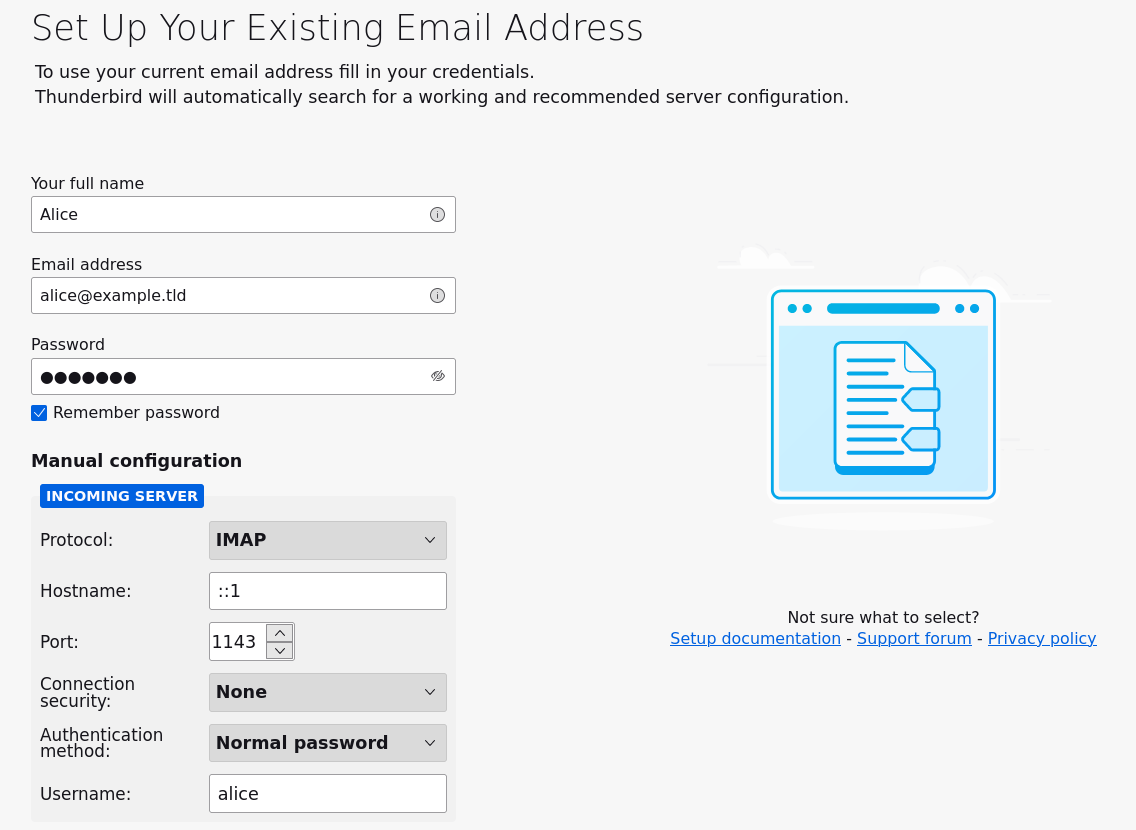
Now that we have Aerogramme acting as a Mail Delivery Agent, we want to connect our devices to it. For this quick start guide, we will use Thunderbird on desktop. On the create account page, start filling the fields.
Your full name: Alice
Email address: alice@example.tld
Password: hunter2
Then click on Configure Manually. New fields will appear, fill them as follow.
Protocol: IMAP
Hostname: ::1
Port: 1143
Connection Security: None
Authentication Method: Normal password
Username: alice
Aerogramme is not a SMTP server but Thunderbird will not let you configure an account without a SMTP server.
You can lie to Thunderbird by putting any existing SMTP server (like smtp.gmail.com) and choose "No Authentication" for the Authentication method field.
A screenshot for reference:

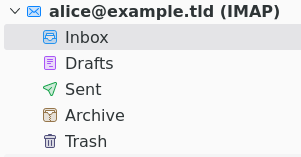
Clic "Done" (or "Re-test" then "Done) and your account should be configured:

As you can see, Thunderbird detected multiple mailboxes but they are all empty. You can copy emails from your other mailbox to fill your Aerogramme one, test search, add/remove flags, and so on. Mail reception will be emulated in the following section.
Emulate the reception of an email
Remember, Aerogramme is about managing your mailbox, not managing mail transfer. As this is an Aerogramme specific, the goal here is not to deploy Postfix, opensmtpd or any other MTA software.
Instead we will emulate their action: forwarding the messages they received to Aerogramme through the LMTP protocol. Python natively supports the LMTP protocol: the following command uses Python to deliver a fake email:
python - <<EOF
from smtplib import LMTP
with LMTP("::1", port=1025) as lmtp:
    lmtp.set_debuglevel(2)
    lmtp.sendmail(
        "bob@example.tld",
        "alice@example.tld",
        "From: bob@example.tld\r\nTo: alice@example.tld\r\nSubject: Hello\r\n\r\nWorld\r\n",
    )
EOF
After running three times this script and clicking on 2 of these 3 emails on Thunderbird, your mailbox should look like that:

Connecting your calendar to Thunderbird
On the Calendar Tab, click on the "New Calendar" button at the bottom left of the window. Then select "On the Network". The credentials are:
Username: alice
Hostname: http://localhost:8087/
Password: hunter2
Then click next, a calendar entitled "Personal Calendar" will be detected. Finish the setup, your calendar is configured.
That's all folks!
That's (already) the end of the quickstart section of Aerogramme.
You have learnt:
- What Aerogramme does
- How to download Aerogramme
- How to run Aerogramme
- How to connect Thunderbird to Aerogramme
- How MTA are transferring emails to Aerogramme
If you are considering a real-world deployment now, you will have many topics to consider, like integration with existing MTA, integration with a service manager, TLS encryption, user management, auto-discovery, persistent storage, high-availability design, observability, backup, updates, etc. All these points will be covered in the Cookbook, it should be your next stop!